
How to Form a Concrete Wall with Plastic Formwork
Plastic formwork has emerged as a game-changer in concrete construction, offering distinct advantages over traditional plywood or steel—including lightweight design, easy assembly, corrosion resistance, and reusability (up to 50 times).
11/6/20255 min read
Plastic formwork has emerged as a game-changer in concrete construction, offering distinct advantages over traditional plywood or steel—including lightweight design, easy assembly, corrosion resistance, and reusability (up to 50 times). Ideal for residential retaining walls, foundation walls, or small commercial projects, it simplifies the formwork process while delivering smooth, consistent concrete finishes. Whether you’re a DIY enthusiast or a seasoned contractor, this step-by-step guide will walk you through building a concrete wall with plastic formwork efficiently and safely.
1. Gather Materials and Tools
Start by compiling the right materials, focusing on plastic formwork systems tailored to your wall’s dimensions. Most plastic formwork comes in modular panels (typically 2–4 feet wide and 2–8 feet tall) with interlocking edges for seamless assembly. You’ll need:
Modular plastic formwork panels: Choose panels rated for concrete pressure (check manufacturer specs—look for load capacity of 50–80 kPa for standard walls).
Connecting hardware: Plastic clips, locking pins, or snap-on latches (included with most formwork kits).
Reinforcement: #4 or #5 rebar (for structural walls) and tie wire.
Concrete mix: Ready-mix concrete (calculate volume using wall length × height × thickness; standard walls are 6–8 inches thick).
Base materials: Gravel (for drainage) and concrete footing mix (if required by local codes).
Tools: Tape measure, laser level, string line, plumb bob, drill (for rebar holes), wire cutters, shovel, wheelbarrow, concrete vibrator (rental), and a trowel.
Safety essentials: Work gloves (to protect hands from plastic edges), safety glasses, and non-slip boots. Avoid gloves with loose fabric—they can get caught in formwork clips.
2. Site Preparation and Planning
Begin by marking the wall’s layout with stakes and string line. Use a laser level to ensure the string is perfectly straight and aligned with your project’s blueprints. Verify key dimensions: wall length, height (most plastic formwork works best for walls 3–10 feet tall), and thickness.
Next, excavate a trench for the footing—critical for distributing the concrete’s weight and preventing settling. The footing should be 12–18 inches wide (twice the wall’s thickness) and extend below the frost line (check local building codes to avoid winter cracking). Compact the trench bottom with a tamper, then add a 2–3 inch layer of gravel to improve drainage. For added stability, pour a 4–6 inch thick concrete footing in the trench and let it cure for 24–48 hours (follow the footing mix’s instructions).
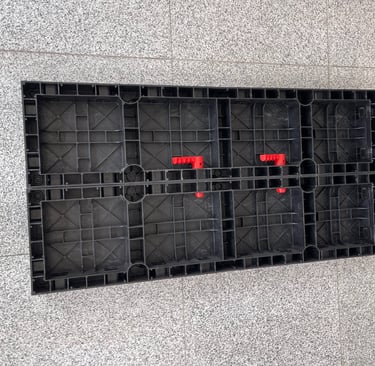
3. Assemble the Plastic Formwork
Plastic formwork’s modular design simplifies assembly, but proper alignment is key to avoiding leaks or bulging. Follow these steps:
Step 3.1: Prepare the Panels
Inspect plastic panels for cracks, warping, or damage—defective panels can compromise the wall’s shape. Clean panels with water to remove dirt or debris (plastic’s smooth surface resists residue, making cleaning quick). If your wall requires custom lengths, use a circular saw with a fine-tooth blade to cut panels—always wear a dust mask and secure panels to a workbench to prevent slipping.
Step 3.2: Set Up the First Panel Row
Place the first row of plastic panels along the cured footing, ensuring the bottom edge sits flush against the footing. Use a plumb bob to confirm panels are vertical (plumb), and a laser level to keep them straight. Secure panels to the footing with plastic anchors (drill small holes through panels and into the footing, then insert anchors) to prevent shifting during concrete pouring.
Step 3.3: Interlock Panels and Add Supports
Connect adjacent panels using the manufacturer’s locking hardware—most systems use snap-on clips or pins that slide into pre-drilled holes. Ensure the interlock is tight to avoid concrete leakage; if gaps exist, apply a thin bead of plastic-compatible sealant (avoid oil-based products, which can stain concrete).
For walls taller than 4 feet, add horizontal supports (called “walers”) across the outer panels. Use lightweight aluminum or plastic walers (steel is too heavy for plastic formwork) and secure them with clips. Space walers 2–3 feet apart vertically to distribute concrete pressure evenly. Add diagonal bracing from walers to stakes driven into the ground—this prevents panels from bowing outward.
Step 3.4: Install Reinforcement
Cut rebar to match the wall’s height and length, then place vertical rebar every 24 inches inside the formwork. Add horizontal rebar every 12–18 inches, and secure intersections with tie wire. Use plastic rebar chairs to keep reinforcement centered (avoid touching panels—this prevents rust stains on concrete). Drill small holes through formwork panels if needed to anchor rebar in place.
4. Pour and Finish Concrete
Step 4.1: Prepare the Concrete
Mix ready-mix concrete according to the manufacturer’s instructions—aim for a workable consistency (like thick cake batter). Avoid adding excess water, as it weakens concrete and can cause surface defects. Test the mix by scooping it with a shovel: it should hold its shape without dripping.
Step 4.2: Pour and Compact Concrete
Pour concrete into the formwork in 6–8 inch layers (called “lifts”)—pouring too quickly can cause panels to bulge. Use a shovel or concrete pump to distribute the mix evenly, and tap the outer panels gently with a rubber mallet to release air bubbles. For optimal compaction, insert a concrete vibrator into each layer (hold it for 10–15 seconds per area) to eliminate voids—this ensures the concrete fills all gaps and bonds with rebar.
Continue pouring until concrete reaches the top of the formwork. Use a straight 2x4 to screed the surface (drag it across the top to level concrete), then smooth the edge with a trowel for a clean finish.
Step 4.3: Cure the Concrete
Concrete needs moisture and time to harden—cover the wall with a plastic curing sheet immediately after finishing (plastic sheets work well with plastic formwork, as they won’t stick). Keep the sheet in place for 7–10 days; mist the surface with water daily if temperatures exceed 80°F (27°C) to prevent drying too quickly (which causes cracking).
5. Dismantle Formwork and Clean Up
Plastic formwork is easy to remove—wait until concrete has cured for at least 48–72 hours (longer for tall walls). Start by removing bracing and walers, then unlock panel clips. Pull panels away gently—plastic’s smooth surface means it won’t stick to concrete, but avoid prying too hard (this can chip the wall edge).
Clean panels immediately after removal: rinse with water and a mild detergent to remove concrete residue. Dry panels thoroughly before storing them (stack flat in a dry area to prevent warping). Reuse hardware for future projects—plastic formwork’s durability makes it a cost-effective long-term solution.
Final Tips for Success
Follow manufacturer guidelines: Each plastic formwork system has unique assembly rules—never mix parts from different brands.
Check load limits: Don’t exceed the panel’s recommended concrete pressure (overloading causes bulging).
Local codes matter: Confirm footing depth, reinforcement requirements, and wall height limits with local authorities.
Reuse wisely: Inspect panels after each use—replace cracked or warped panels to ensure consistent results.
By using plastic formwork, you’ll save time, reduce waste, and achieve a professional-quality concrete wall. Its ease of use and reusability make it a smart choice for modern construction, whether you’re building a garden wall or a foundation. With careful planning and attention to detail, your project will be strong, durable, and visually appealing.
Solutions
Comprehensive concrete formwork and reinforcement systems.
Contact
Email: kevin@zhuniuformwork.com
Whatsapp/Wechat: +86 180-5453-3152
© 2025. All rights reserved.Company:Linyi Zhuniu Building Materials Co., Ltd